
Home Improvement
How to Plan the Electrical Layout for a Kitchen Remodel
Most kitchen remodels get planned in the wrong order. Homeowners pick out cabinets, countertops, and appliance placement first, then treat the electrical work as an afterthought – something the electrician sorts out once the layout is locked in. But that sequence causes real problems: the most beautifully designed kitchen is useless if there’s nowhere to plug in your appliances. Outlets end up in awkward spots, circuits get overloaded, and appliances that need dedicated power find themselves fighting for space on a shared line.
Getting the electrical plan right from the start isn’t just a code requirement – it’s what makes the rest of the design actually work.
Start With Your Appliances, Not Your Outlets
The first thing to do is to assign a specific location on the floor plan to each appliance. This has nothing to do with how pretty the kitchen will look or where you expect to put your stove. This is the map that will tell you what circuits you need before anybody drills a hole or hammers a nail.
The high-draw appliances are each on a dedicated circuit. Refrigerator, dishwasher, microwave, electric range, and wall oven draw enough power that they will either trip a shared circuit or their own internal breakers if they share with something else. That’s bad for the appliance and potentially inconvenient at best for you. A dedicated circuit is one breaker, one wire run, and one outlet or hard-wired connection for one appliance. None of the above is shared.
Panel Capacity And The Rough-In Phase
This is often the part of the project most homeowners underestimate. Every dedicated circuit, every countertop circuit, every lighting circuit needs a slot on the electrical panel. A kitchen remodel that adds four or five dedicated circuits plus updated lighting can push a smaller panel past its capacity.
Before the rough-in starts, have a licensed electrician assess whether your existing panel can handle the new load. Older homes with 100-amp service often can’t support a modern kitchen without upgrading to 150 or 200 amps. Discovering this mid-project, after walls are already open, adds time and cost. Finding out before the project starts just adds one more line item to plan around.
The rough-in phase – where cables get run through wall studs and framing before drywall closes everything up – is the only low-cost window to make changes. A company like The Wire Guy Electric handles the permits, panel evaluation and rough-in work that turn a floor plan into a real circuit layout.
Countertop Outlets: The 24-Inch Rule
This is one NEC rule that probably doesn’t make it onto the radar of most homeowners until it’s too late. But it’s a rule that every professional electrician knows by heart – the rule that says no point along a countertop wall line can be more than 24 in. from a receptacle. The idea is straightforward: no extension cords on kitchen counters.
In practical terms, this means you’re going to need more outlets than you might think. A long run of countertop requires receptacles in more-or-less regular spacing, and any section of counter that is longer than a foot needs at least one receptacle serving it. Those receptacles have to be on a 20-amp circuit.
The small appliances used in kitchens by their very nature draw a lot of power, much more even than can be supplied by general lighting and receptacle circuits in most homes wired on a 15-amp circuit. Whether it’s a coffee maker, toaster oven, blender, or stand mixer, all those little motors are big draws.
GFCI And AFCI Protection
GFCI (Ground Fault Circuit Interrupter) protection is needed wherever water and electricity are near each other. Any outlet within six feet of a sink and all countertop receptacles generally must be GFCI protected. Those outlets notice the tiny imbalances in current that indicate electricity may be flowing through an unintended path (like a person) and cut power in a fraction of a second.
AFCI (Arc Fault Circuit Interrupter) protection works differently. It’s in the breaker rather than the outlet, and it detects the irregular electrical ‘signature’ of an arc fault – damaged or deteriorated wiring that can ignite surrounding material without tripping a standard breaker. Roughly said the National Fire Protection Association (NFPA) says electrical distribution or lighting equipment is involved in an estimated 10% of all reported home structure fires. One of the more effective ways to reduce that risk in a remodeled kitchen is AFCI breakers.
Tamper-resistant receptacles (TRR) – outlets with built-in shutters that block foreign objects – are also the modern code’s requirement as the new installation standard.
Lighting: Three Layers, Separate Controls
Kitchen lighting is functional over decorative, and you can’t get by with a single ceiling fixture. The standard three-layer approach:
- Ambient lighting for general illumination, typically recessed ceiling lights throughout.
- Task lighting to light your work surfaces, where under-cabinet LEDs earn their cost by effectively eliminating the shadows your body would cast on your prep when you’re cooking at the counter.
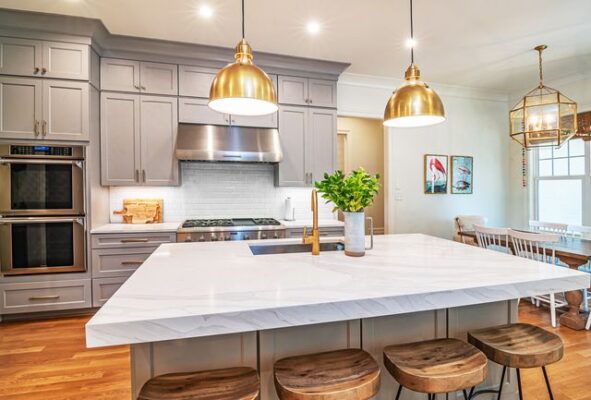
- Accent lighting for atmospheric and visual pops (like some gorgeous pendants over your island).
Each layer should have its own circuit and dimmer. This allows you to control the mood without every light blasting in your face every time you enter the room.
USB receptacle and combination outlet upgrades are also worth considering at this phase. Installing during rough-in can be done for almost nothing extra. Retrofitting these after the walls are closed will cost you a wall.
Don’t Leave This For The Last Phase
Designing the electrical system for your kitchen is not the project you bring in after the cabinets are chosen. It determines where you can have cabinets, where the island can go, and what appliances your kitchen is capable of supporting.
Plan for it at the same time you’re planning everything else, schedule a panel check as soon as you can, and make sure every circuit is designed and approved before the walls come down. That’s how you get a remodel that looks as good as it works.