
Business
Injection Mold Transfer as a Qualification Handover: Baseline Data, Inspection, and Revalidation
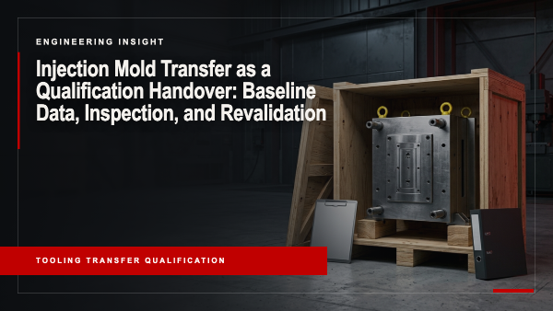
A mold arrives at the new supplier on schedule. The truck has been unloaded, the tool is on the press, and the first shots look reasonable. The transfer is reported as complete. Three weeks later, parts from the new supplier fail a dimension that was never a problem before, and nobody can say whether the cause is the tool, the press, the process, the material, or the measurement.
Moving a mold is a logistics event. Transferring a mold is a qualification event. A successful transfer shows that the receiving supplier can reproduce the approved part and the agreed production baseline, and it proves this with evidence collected before and after the move. That evidence has to be planned before the tool is packed, because much of it can only be captured at the original supplier.
This injection mold transfer checklist is organized around that idea: define success, assemble the documentation, capture the baseline, audit the tool and the receiving press, run comparative trials, and release only when deviations are closed.
Define Transfer Success Before the Tool Moves
A transfer without a written definition of success tends to end when the first acceptable part appears, which is usually too early.
State the acceptance condition
Write down what “transferred” means. Typical elements include:
- parts meet the current drawing and cosmetic standard;
- critical characteristics match the last approved production baseline within agreed limits;
- functional or assembly checks pass;
- the process runs stably at the receiving supplier for an agreed run length;
- the documentation package is complete and under the receiving supplier’s control.
Decide what must match the baseline
Not every characteristic needs the same treatment. Identify which dimensions, weights, cosmetic features, and functional properties must be compared with the original supplier’s data, and which only need to meet the drawing. The approved-sample and baseline records produced during tooling validation are a useful model for what this comparison set should contain.
Identify approval and contractual conditions
Check the contract, customer approval requirements, and any production-release conditions before shipping. In regulated or contract-controlled supply chains, a change of manufacturing site can trigger formal customer notification or approval; confirm the applicable requirements with the customer before the move.
Separate mandatory revalidation from risk-based items
The Global Harmonization Task Force (GHTF) process validation guidance for medical device quality systems lists transfer of processes from one facility to another as an example of a reason revalidation may be necessary, and states that the need for revalidation should be evaluated and documented [1]. It also notes that revalidation may not need to be as extensive as the initial validation if not every aspect must be repeated [1]. Although written for medical devices, the logic is useful for any transfer: decide in advance which checks are mandatory, which depend on risk, and which the agreement requires.
Assemble the Tool and Part Documentation Package
The receiving supplier can only reproduce what it is told about, so the documentation package should travel with the tool, not after it.
Part documentation
- current 2D drawings and 3D data, with revision status;
- material specification, including grade and any approved alternates;
- approved samples and cosmetic references;
- recent inspection records and dimensional reports.
Tool documentation
- mold drawings and component list;
- cooling circuit layout and connection information;
- ejection, slide, and lifter details;
- hot-runner layout, zones, and controller requirements, if applicable;
- maintenance history, repair records, and replaced components.
Physical references
- last accepted shots, identified by cavity and date;
- appearance references and boundary samples;
- gauges, fixtures, and checking aids used for acceptance;
- auxiliary equipment requirements, such as temperature controllers, dryers, robots, or end-of-arm tooling.
Open issues
Record revisions, open deviations, known defects, temporary repairs, and the person responsible for each document. Known issues that are not written down tend to be rediscovered at the receiving supplier as “new” problems.
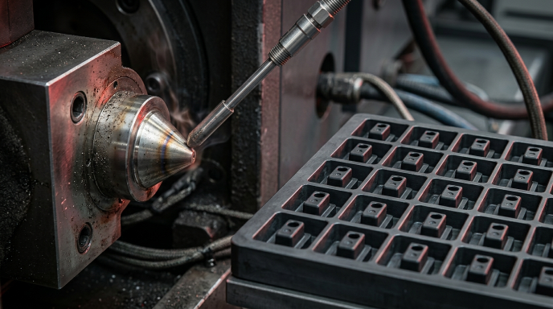
Capture Baseline Data Before the Move
Some of the most valuable transfer evidence exists only while the tool is still running at the original supplier.
Record process conditions as plastic conditions
The last accepted process conditions are essential, but machine setpoints often do not transfer directly between presses. In Plastics Technology, John Bozzelli argues that the challenge is to document the plastic parameters of a process rather than machine parameters, and that hydraulic pressure is a machine-specific value that must be converted to plastic pressure using the machine’s intensification ratio [2]. He notes that stock machines can range from about 8:1 to 40:1 [2]. RJG explains that hydraulic pressure, specific (plastic) pressure, and cavity pressure are different measurements, and that cavity pressure is significantly lower than specific pressure because of losses through the nozzle, runner, and gate [3].
For the baseline record, capture:
- fill time and transfer position, with the resulting plastic pressure at transfer;
- pack and hold plastic pressure and time;
- melt temperature measured at the nozzle or by air shot, not only barrel setpoints;
- actual mold temperatures and coolant conditions;
- cooling time and total cycle time;
- material grade, lot, and drying conditions.
Record these as reference conditions, not as settings that will automatically reproduce the part on another press.
Capture part data with cavity identity
Record part weight by cavity, critical dimensions by cavity, appearance status, and the known variation range. If the tool has cavity-to-cavity differences, they belong in the baseline.
Define the comparison
Decide in advance which measurements will be repeated at the receiving supplier, using which methods, gauges, and conditioning times, so that the comparison is like for like. Dimensional comparisons should use the same measurement conditions; ISO 20457:2026 specifies acceptance conditions for plastic molded parts and is one reference for agreeing how dimensions are evaluated [4]. Agree the reporting format at the same time, in the way a supplier’s inspection and quality documentation is scoped to the drawing and approval requirements, so both sites report results in the same form.
Preserve material context
Where material lot or moisture state affects comparability, record them, and if possible ship retained material from the same lot for the first trial.
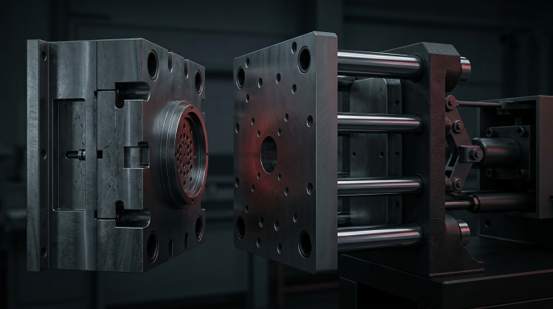
Audit Tool Condition and Receiving-Machine Compatibility
Before the first trial, check the tool and the receiving press together, because a problem in either one will show up as a part problem.
Tool condition
Inspect cavity and core surfaces, parting lines, vents, cooling channels, ejection, slides, lifters, and inserts. Photograph surfaces and record damage before shipping and again on arrival. This separates transport damage from existing wear.
Press compatibility
Confirm that the receiving press fits the tool: mold dimensions against platen size and tie-bar spacing, mold height against open and closed daylight, clamp tonnage, shot size relative to barrel capacity, nozzle and locating ring interfaces, ejector pattern, and utilities.
Differences in the production system
List differences in machine type (hydraulic or electric), auxiliary equipment, water connections, hot-runner controllers, robot interfaces, and process-monitoring capability. Each difference is a potential source of variation and should be considered before the first trial.
Repair versus process difference
Before the first trial, decide which findings require tool repair and which may only require process adjustment. Mixing the two during trials makes it difficult to attribute results.
Run Baseline and Receiving-Supplier Trials
With the tool checked and the baseline in hand, trials at the receiving supplier can be run as a comparison rather than a fresh start.
Controlled first trial
Run the first trial with documented setup conditions and material state. Begin from the baseline plastic conditions rather than copying setpoints, and record what was actually required to reach them.
Compare against the baseline
Compare filling behavior, cooling, ejection, part weight by cavity, dimensions, appearance, and function with the baseline. Keep cavity identity and sample traceability throughout.
One good sample is not a process
A single acceptable sample does not prove repeatable production. Plan a run long enough to show stability, and evaluate variation, not only the mean. The GHTF guidance cautions that historical data of a pass/fail nature is usually not adequate for validation [1]; the same applies to transfer evidence that records only “OK” rather than measured values.
Revalidate, Close Deviations, and Release the Tool
Differences found during trials are expected; what matters is that each one is explained and closed before production is released.
Classify differences
When the receiving supplier’s parts differ from the baseline, classify each difference as tool condition, machine, process, material, or measurement system. A dimension that shifts uniformly across all cavities points in a different direction from one that shifts in a single cavity.
Close each deviation with evidence
For each deviation, define the corrective action, the owner, the evidence required, and the recheck. Repeat the relevant dimensional, appearance, functional, and process-stability checks after correction.
Obtain approval and update the baseline
Obtain the required approvals, then update the production baseline with the receiving supplier’s validated conditions. The old supplier’s settings remain a historical reference; the new baseline becomes the controlled process.
Transfer checklist summary
| Stage | Key evidence |
|---|---|
| Before shipping | Acceptance condition, documentation package, last accepted shots, baseline process and part data, tool condition record |
| On arrival | Tool condition recheck, press compatibility confirmation, list of system differences |
| First trial | Recorded setup, plastic conditions achieved, cavity-identified samples, comparison with baseline |
| Release | Closed deviations, stability evidence, approvals, updated baseline |
Buyers less familiar with the molding process itself may find general background on plastic injection molding helpful when reviewing the baseline process data with the receiving supplier.
Frequently Asked Questions
The questions below cover what buyers most often need to settle when planning a mold transfer.
What documents are needed for an injection mold transfer?
Current part drawings and 3D data, material specifications, approved samples, inspection records, mold drawings and component lists, cooling and ejection information, maintenance and repair history, last accepted shots, gauges, and a list of open deviations.
Can I copy the process settings to the new press?
Not directly. Hydraulic pressure is machine-specific and must be converted using each press’s intensification ratio [2]. Record and reproduce plastic conditions, such as pressure, flow rate, temperature, and cooling, rather than setpoints.
Is revalidation required after a mold transfer?
Often, depending on the product, contract, and risk. The GHTF process validation guidance lists transfer between facilities as a reason revalidation may be necessary and says the need should be evaluated and documented [1].
What are last accepted shots?
Parts from the final production run before the move, identified by cavity and date. They provide a physical reference for dimensional and cosmetic comparison at the receiving supplier.
How long should the receiving-supplier trial run?
Long enough to show stable variation, not just one acceptable sample. The run length should be agreed in the transfer plan based on part risk and approval requirements.
Conclusion
A mold transfer succeeds when the receiving supplier can reproduce the approved part and baseline, not when the tool arrives. Define the acceptance condition before moving the tool, preserve baseline data that can actually be reproduced, recorded as plastic conditions rather than machine setpoints, and inspect the tool and the receiving press as one production system. Release the tool only after deviations are closed and the required part and process evidence has been approved.
Sources
[1] Global Harmonization Task Force: GHTF/SG3/N99-10:2004, Quality Management Systems – Process Validation Guidance (Edition 2). https://www.gmp-compliance.org/files/guidemgr/ghtf-sg3-n99-10-2004-qms-process-guidance-04010.pdf
[2] Plastics Technology (J. Bozzelli, 2020): In Search of a Universal Setup Sheet. https://www.ptonline.com/blog/post/in-search-of-a-universal-setup-sheet
[3] RJG: What Is the Difference Between Hydraulic, Specific, and Cavity Pressure? https://rjginc.com/hydraulic-specific-and-cavity-pressure/
[4] ISO: ISO 20457:2026, Plastics Moulded Parts – Tolerances and Acceptance Conditions. https://www.iso.org/standard/90304.html